


-2.svg)


-1.svg)


Seemingly every year, Microsoft adds new features and capabilities to their flagship Microsoft Office software, MS Word.
The popular word processing software is used in businesses around the globe and is the number one such solution in the U.S. by a wide margin.
While the user-friendly nature and functionality of Microsoft Word’s word processing capabilities are well-known, many users are unaware that the platform can also be used to create organizational charts or “org charts.”
Most business leaders understand the importance of making an org chart. However, deciding which platform to use to make an org chart can bring about feelings of uncertainty.
With that in mind, the team at Functionly has crafted this guide to creating a hierarchy chart in Word. We not only provide step-by-step guidance for creating an org chart but also examine whether this Word feature is a minimally useful afterthought or a valuable tool that you should be taking advantage of.
Why Create a Hierarchy Chart in Word?
Creating a hierarchy chart on Word — or any platform for that matter — can help you maximize organizational transparency.
An org chart helps everyone across your organization understand their roles and the responsibilities of other departments. This understanding can improve collaboration and enhance the overall productivity of the company.
Dynamic org charts offer a multitude of other benefits as well. Namely, they can be used to identify responsibility gaps or overlaps in your company’s hierarchy. Once these potential responsibility conflicts are identified, you can proactively work to remedy them in order to streamline internal processes.
How to Make an Org Chart in Word
If you read our guides to making org charts in Excel and PowerPoint, then you may already be familiar with the “SmartArt” submenu that shows up in different Office applications. As in the other applications, this menu will be used quite often when creating an org chart in Word.
On that note, let’s look at the steps you need to follow to create your Microsoft Word org chart.
1. Click Insert and Open the SmartArt Dropdown
When working from a new Word document, start by clicking on the “Insert” tab at the top menu ribbon. Next, click on “SmartArt.” This action will open a dropdown menu.
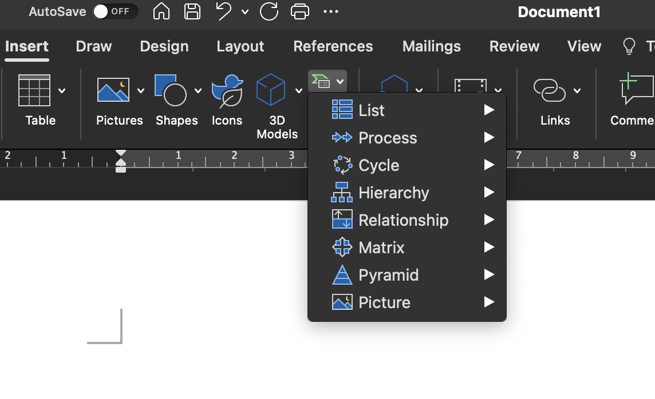 Select the "SmartArt" icon from the "Insert" menu tab.
2. Choose Hierarchy
From the SmartArt menu, hover your mouse cursor over the word “Hierarchy.” This hovering will open a fly-out menu to the right of your cursor.
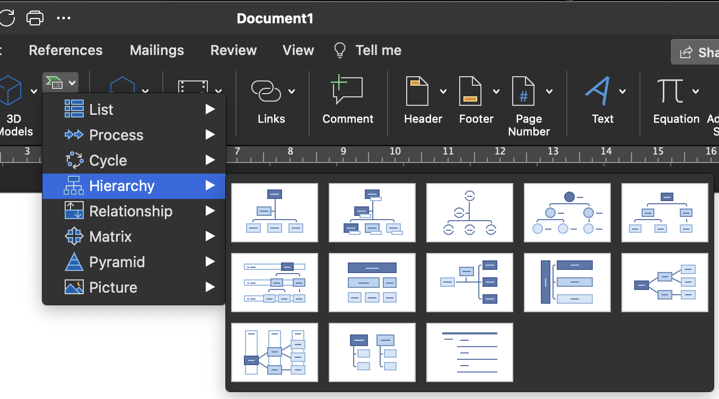 Hover over the "Hierarchy" option to see the fly-out menu.
3. Select a Chart
This newly opened fly-out menu will feature several different chart sizes and styles. The most commonly used option is a standard vertical hierarchy chart. If you have not created an org chart before, we suggest using this option. It features a pyramid-style layout with a single shape at the top and additional shapes in each subsequent layer.
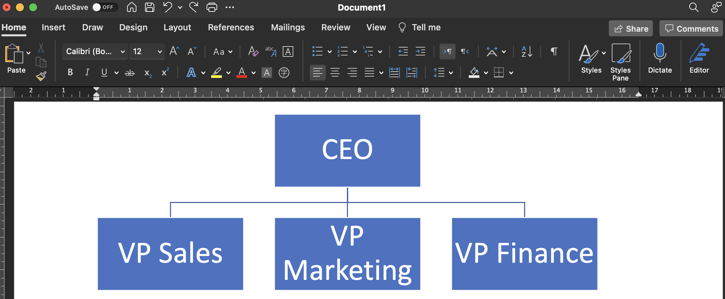 A standard vertical hierarchy chart.
4. Add Staff Descriptions
After your chart has populated into the document, click on a shape and start adding employee and department descriptions. Start with the top shape and work your way down the chart. This flow will ensure that you do not inadvertently skip any staff members or departments.
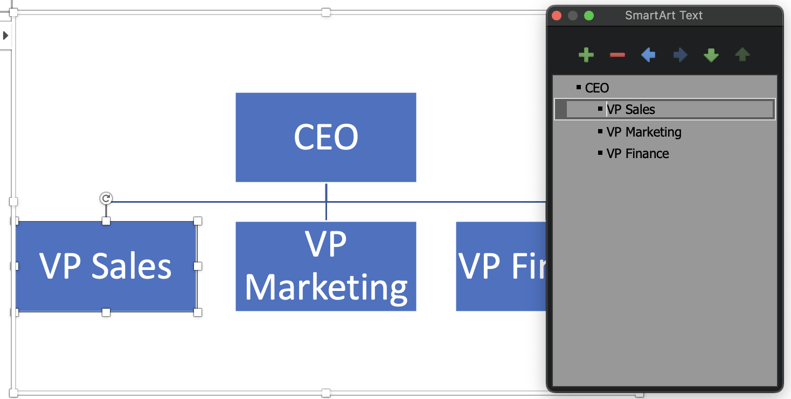 Use the SmartArt Text box to add staff descriptions.
5. Customize Your Org Chart
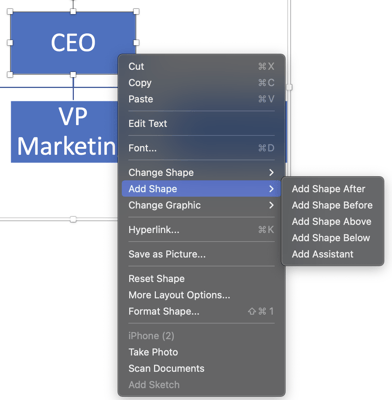
You can add or subtract shapes as needed. To accomplish this, hold down “Control” and right-click on a shape. When the new menu opens, hover over “Add Shape” from the list of options.
When you place your cursor over “Add Shape,” you will be able to select one of several options. You can insert a new shape above, below, behind, or in front of the shape that you selected.
If you prefer to use the SmartArt menu on the left side of your screen, click on a shape and then select the “+” icon in the menu. This action will present the same four options as outlined above and allow you to quickly add shapes to your chart.
6. Format Your Chart
When formatting your chart, you can alter the font of your text or change the colors of shapes. You can color code segments of your chart in order to differentiate between various departments or managerial hierarchies.
To format your chart, select “Format” from the top ribbon. Alternatively, you can highlight text and then use the font size and style dropdowns in the top menu.
Benefits of Creating Org Charts in Word
Creating org charts in Word is easy, fast, and cost-effective. You already have access to the platform, and your staff is probably very familiar with the software. This setup means that you can quickly create org charts and begin distributing them to your staff.
Limitations of Word Org Charts
Unfortunately, the limitations of Word org charts far outweigh any potential benefits. Word org charts are static and lack any real dynamic features. As a result, they are essentially just pictures that can help explain your organizational hierarchy.
At the end of the day, Microsoft Word is a word processor. All of its auxiliary features add to the software’s usefulness, but they do not stack up against dedicated solutions — solutions like Functionly’s org chart management platform.
Why Functionly Represents a Better Option
Functionly’s robust platform makes it easy to create org charts that are dynamic, interactive, and shareable. Our platform can be used to create org charts, assist with workforce planning, ensure functional alignment across departments and teams, and optimize collaboration.
If your organization wants to leverage the power of a truly dynamic org chart creation and management platform, you can try Functionly for free by taking advantage of our 22-day trial. Sign up today.
An organization chart in Functionly.

