
Contents:
This feature is currently in Beta, so we're very interested in your feedback
Email support@functionly.com or share it with us on our Contact Us page.
1. How the change plan works
Making a change to a scenario generates a "revision," which you can think of as being like a version of the scenario at that exact moment. The change plan allows you to compare the difference between your current revision (version) of the scenario and another scenario or revision of the same scenario.
Comparing different scenarios means that you can take a copy of your current state, make changes to propose your future state, and compare the two for a list of the changes you need to make to get to that point.
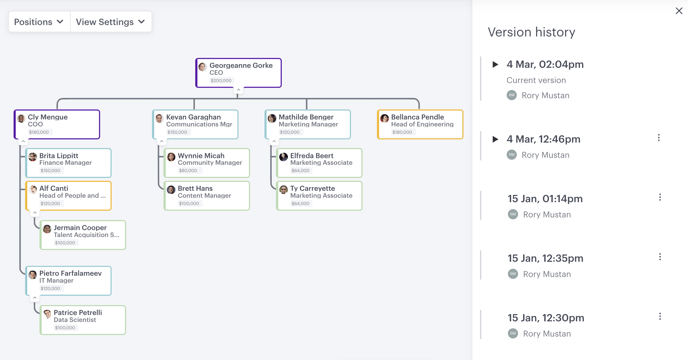
2. View a change plan
Compare a previous revision
Comparing a previous revision will allow you to review the changes that have taken place in your organization from that point up until your current state scenario.
Steps to compare revisions:
- If not open already, select "Change plan" in the left-hand menu
- Click "Select to compare"
- Choose any timestamp from the list
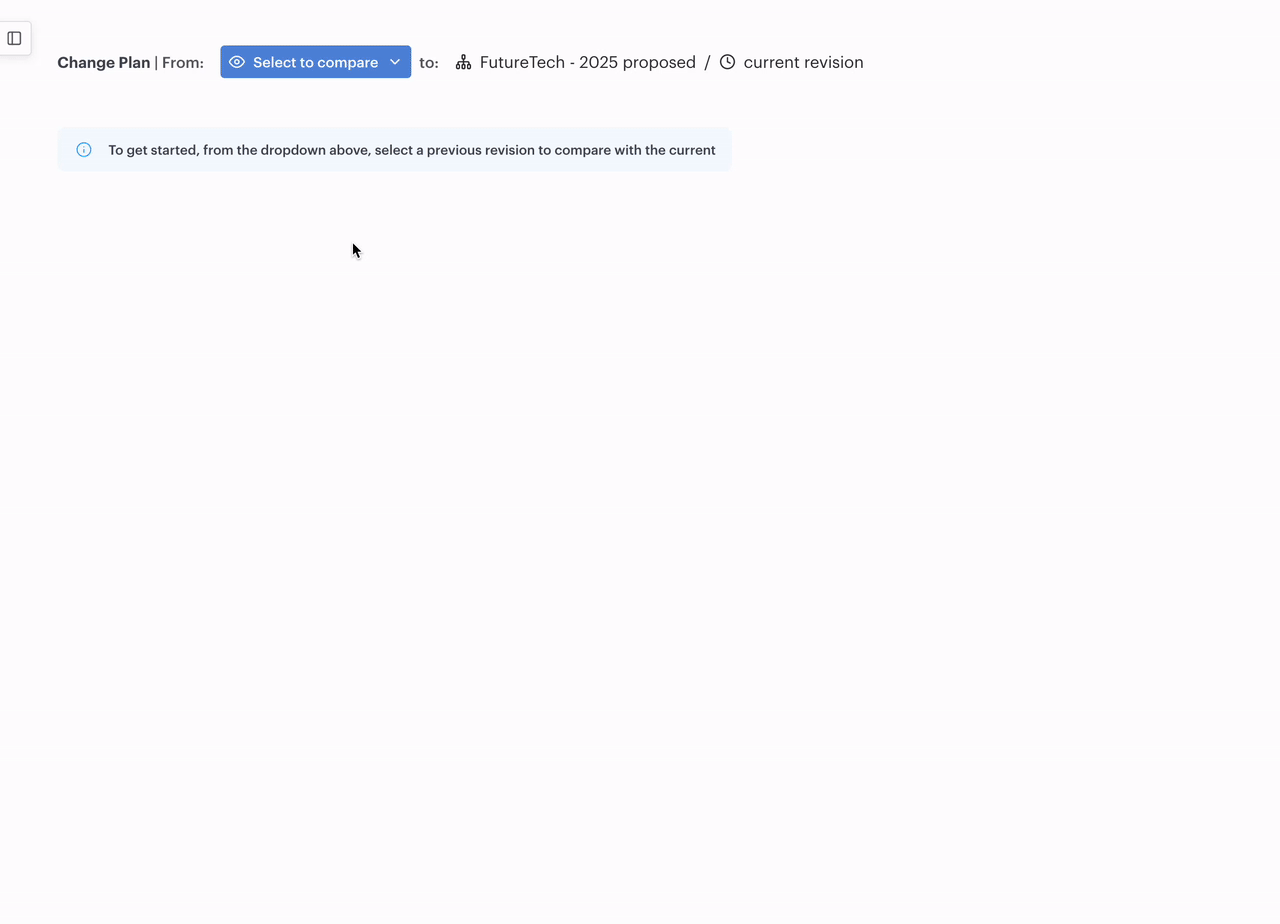
Compare another scenario
When you want to understand the changes needed to transform your organization from its current state to a planned future state, comparing between scenarios is the way to go.
Steps to compare scenarios:
- If not open already, select "Change plan" in the left-hand menu
- Click the "Select to compare"
- Select "Another scenario"
- Click on the scenario from the list
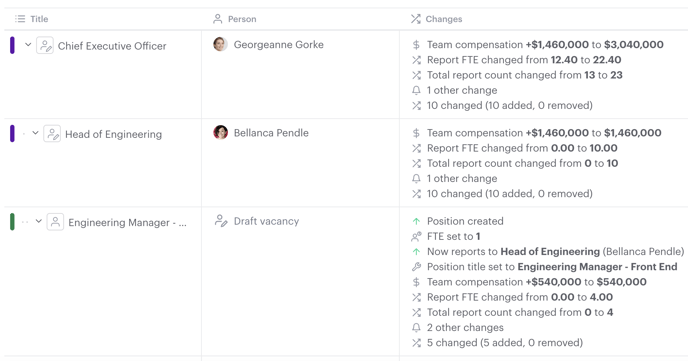
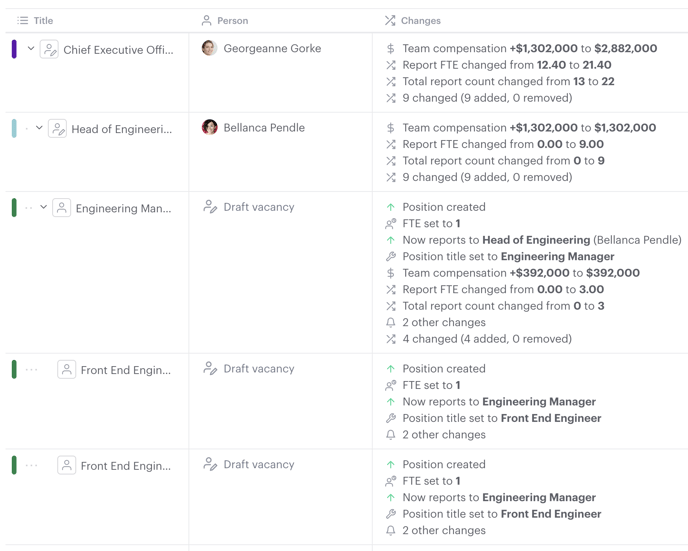
3. Interpreting the table
Changes appear in a list format, showing each position within its hierarchy in the organization. For example, if there are new positions added to an Engineering Manager's team, the positions above the Engineering Manager in the hierarchy will appear above, all the way up to the CEO.
These can be collapsed to allow you to focus on specific areas of changte
The change table has three columns: "Title", "Person," and "Changes." Below, we explain what each column indicates.
In this section:
Title
"Title" refers to the title of the position or group that has changed. If a position's "title" is updated, this will be reflected in the "changes" column, and the "title" will reflect the new version.
Clicking on any title on the change table will open its position menu on the right-hand side.
Person
Person refers to the "person" who occupies the position that's associated with the title. If the person occupying the position is changed, the column will reflect the new person who has been added.
Clicking on any title on the change table will open its position menu on the right-hand side.
Changes
This column will reflect changes made to any data associated with the position.
4. Export your change plan
Exporting your change plan to CSV provides more detailed data on each change, including the position or group affected's previous state.
Steps to export:
- Once the comparison has run
- Click the export button near the top right
- Select "Download CSV"
This feature is currently in Beta, so we're very interested in your feedback
Email support@functionly.com or share it with us on our Contact Us page.