
Contents:
- Add and remove vacant positions
- Track vacant positions
- More data for your vacant positions
- Collaborate with your team on vacant positions
1. Add and remove vacant positions
In this section:
Add vacancy positions
To get a visual understanding of where a new position is going to fit in your organization you can add vacancies using the org chart or if you need to easily add important data such as compensation, effort, start, or end date, in one place, you can use the people & positions table.
Add vacant positions using the org chart
- Hover next to or below any position
- Click the plus ➕ icon
- Or click the ellipsis (three dots) and select "new position"

Add vacancies using the people & positions table
To add a vacancy using the people & positions table scroll to the bottom of the table and click "+ add position". This will create a vacant position at the bottom of the list where you can easily add a position title and assign a manager using the field in their row.
Remove vacancies...
Remove using the org chart
To remove a vacancy from the org chart click the ellipsis on the top right corner of the position and select "remove position" or drag and drop the position to the bottom left where "drop to remove" will appear in red.

Remove using the people and positions table
On the people and positions table, you can remove a position by clicking the ellipsis on the left-hand side of the table and selecting "remove position".
When you remove a position it will appear under "not in org chart" in the "Explorer" section of the lef-hand menu. Using "Delete" will delete them from the scenario.
2. Track vacant positions
When you're in the midst of a busy hiring period, it's easy for open positions to get lost in the shuffle. Having a clear system to identify, track, and update vacancies is essential to staying organized and efficient.
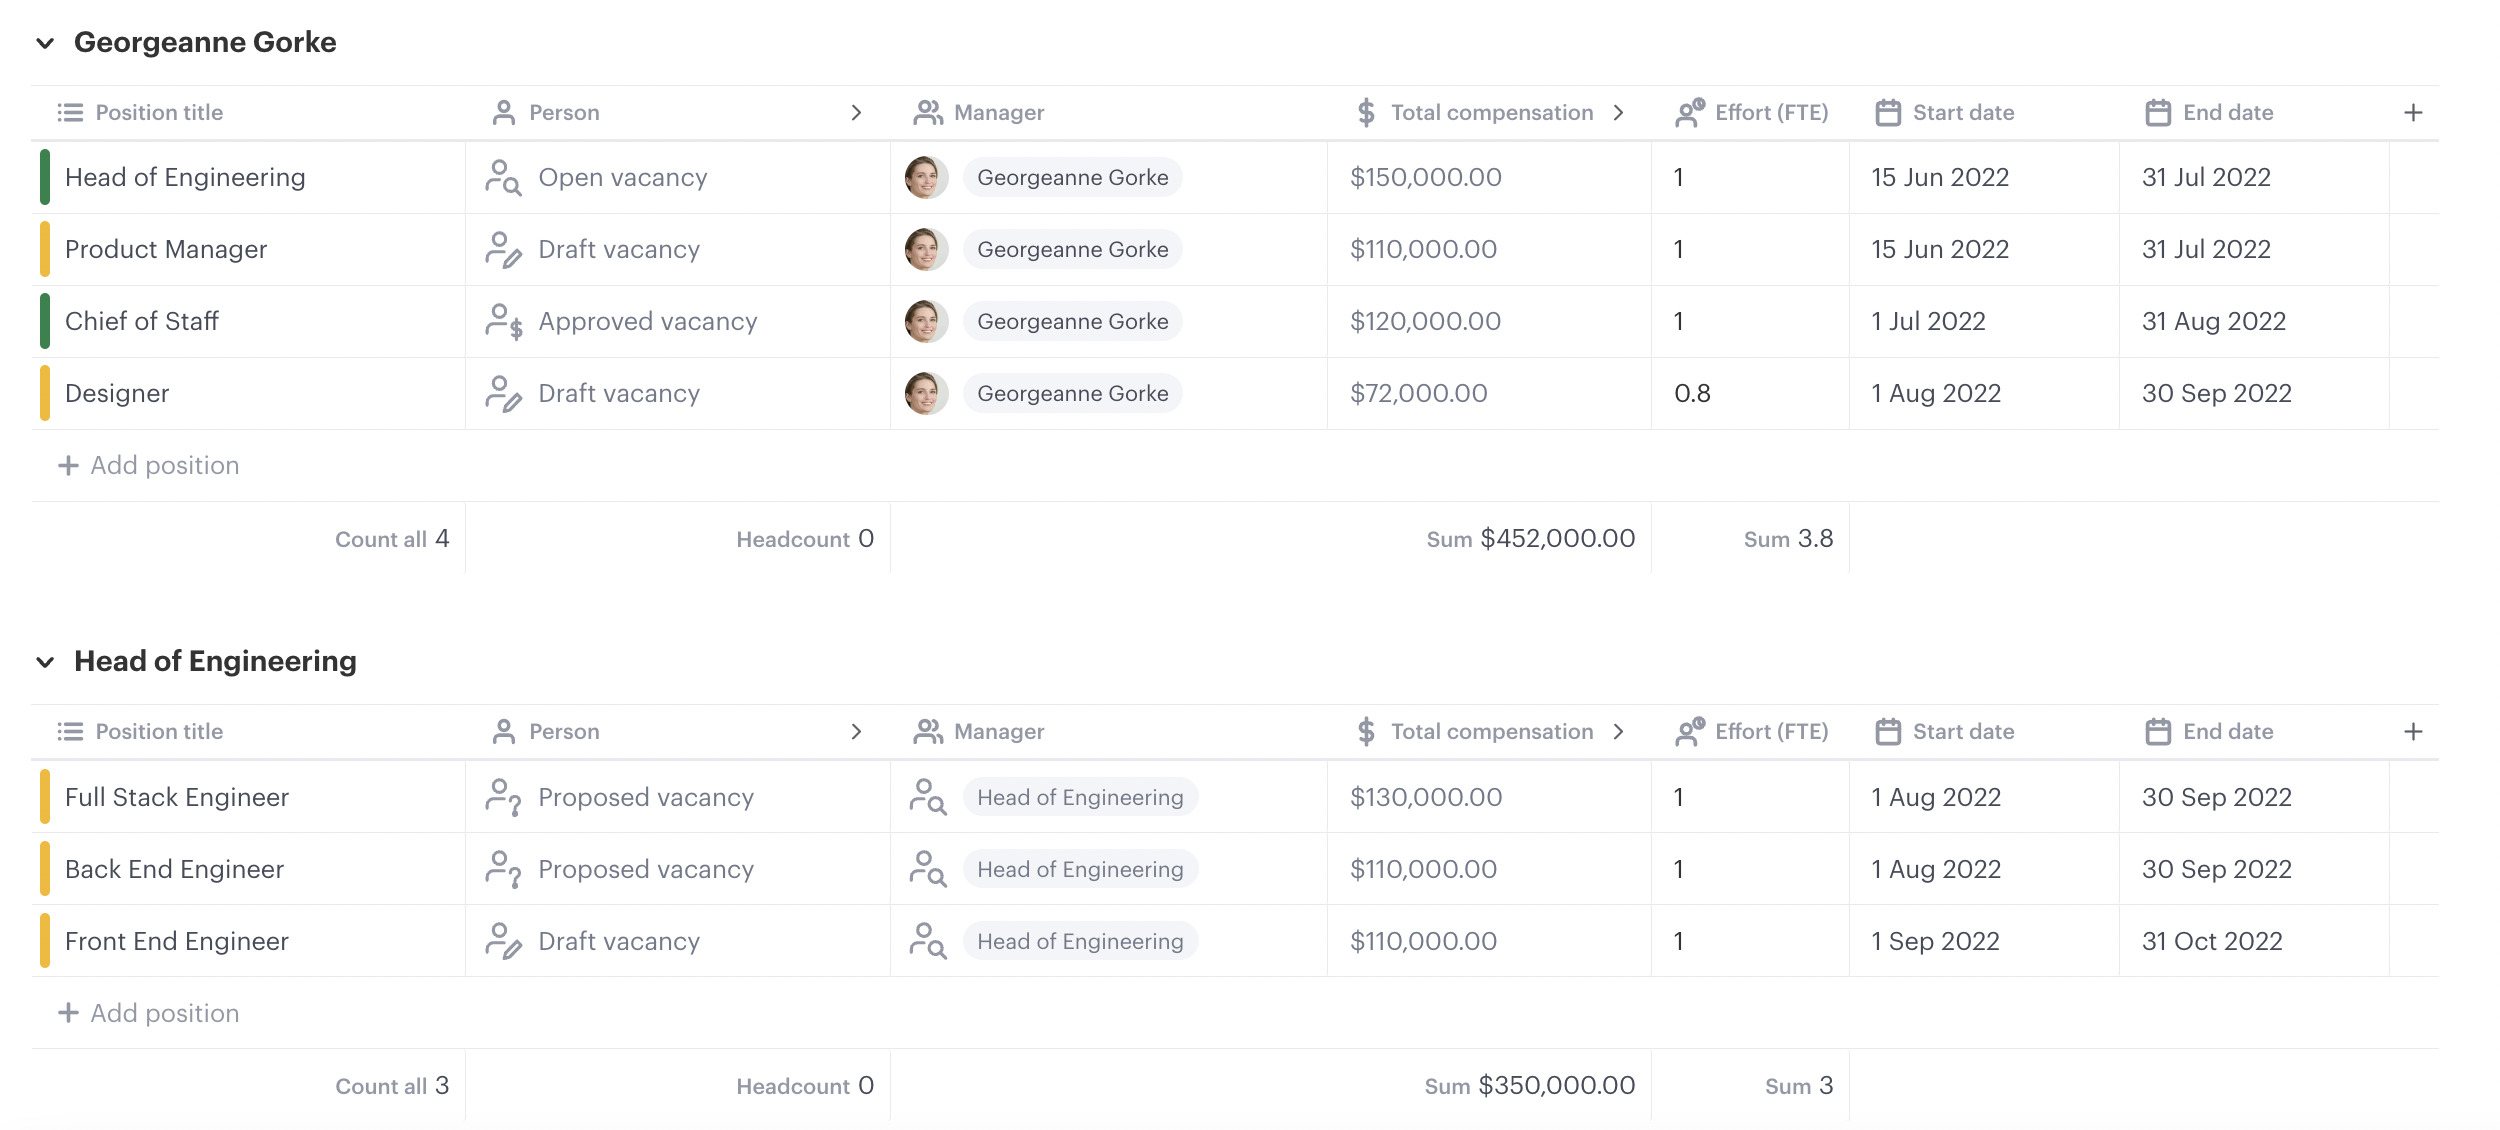
In your org chart, open positions will display a "vacancy" label where an employee’s name would usually appear. By default, any new vacancy will show as "Draft Vacancy" until you update it. To make each vacancy easier to recognize and track, you can assign a unique Position ID, which will be displayed next to the vacancy status on the org chart.
In the steps below, we’ll guide you through updating the Position ID and Vacancy status, helping you keep a clear overview of all open roles in your organization.

In this section:
Add a Position ID
Most organizations use some form of a unique identifier for each vacancy and you can replicate this in Functionly by adding a Position ID

Update vacancy status
Vacancy statuses act as an indicator for which stage of the hiring process each position is at. Below, we show they can be updated and what each status means.
Update vacancy status on the org chart
- Click on the white space on any vacant position
- Click the "Vacancy" dropdown
- Select your chosen status

Update vacancy status on the people & positions view
- Hover over a position
- Click the ellipsis (three dots) to the left
- Select "view position"
- Click the vacancy dropdown on the right hand menu
- Select a status

Understanding each vacancy status
Draft
The position is still being worked on by key stakeholders but has not yet been approved. It may be that cost, start date or title is still being decided upon.
Proposed
Key information for the position has been decided upon and it has been shared with key stakeholders for approval.
Approved
Key information for the position such as; cost, projected start date, full-time equivalent, and title, have received all the necessary ticks of approval from stakeholders in the process.
Open
Having been approved, the position is open for recruitment and your organization is actively seeking and interviewing candidates.
Accepted
Recruitment has closed and a candidate has been chosen, and accepted the position.
Declined
An offer was extended to the successful candidate but they chose to decline the offer.
2. More data for your vacant positions
When managing your vacant positions through the hiring process it's important that data is kept up to date and other stakeholders understand what stage in the cycle each position is at. Below we have detailed some of the key components that will help make it a more cohesive process.
In this section:
- Compensation
- Effort (FTE)
- Start & end date
- Custom text properties
- Roles & responsibilities
- Filter your view
Compensation
Adding and adjusting compensation will allow for more efficient budget forecasting.
Learn how to add compensation to your scenario.
Effort (FTE)
Effort (FTE) can be added in bulk when importing your people with a CSV but if you don't specify a value initially, each position will receive a value of one (full-time) by default, or equivalent to a full-time position. Effort can also be changed for any position, even after it has been initially set.
Change Effort (FTE) on the org chart
Change effort on the people & positions table
Effort can be amended using the people & positions table by clicking on the Effort field or clicking the outward pointing arrows that appear on any compensation field when you hover over it.
Effort or FTE (Full-Time Equivalent) is how much a person is expected to work with 1 being someone who is full-time, 0.8 being someone working four days a week, 0.2 one day etc.
Start & end date
Setting a hiring window for each position can be vital for accurate budget forecasting, and in situations where you may be hiring for many positions it can provide a clearer picture of the road ahead.
Set a start date using the org chart:
- Click on the white space of any position to open the position menu on the right
- Click on the "start date" field
- Input a projected start date
Set a start date using the people & positions view:
- Click view dropdown near the top left
- Select "people & positions"
- Click properties menu near the top right
- Ensure "start date" is toggled "on"
- Click on any start date field in line with a vacant position
- Input a projected start date
Custom text properties
If there is information about a vacant position that you would like to communicate that isn't available as a property in Functionly, you can add your own custom text properties.
To do this click the "properties" tab in the top right and "+ Add a property" or click the plus symbol on the top right of the "people & positions" table. Once created, the property can then be toggled on to appear across your org chart.
Roles & Responsibilities
If you have a smaller number of positions that you're recruiting for, or you really want to go into detail on each role, you can add responsibilities to a position using roles. You can learn more about adding, editing, and creating roles and responsibilities here.
Filter your view
Once you have added all relevant data you can filter the people & positions table to group and order your vacant positions as you want to see that information. For instance, you can filter "only vacancies" to exclude all occupied positions, group by "vacancy status" to see which are at the most advanced stage in the process, and order by start date to get an idea of a timeline.
Any order or grouping you filter your people and positions table by can be exported directly to CSV in that order to share with relevant stakeholders such as your finance team.
3. Collaborate with your team on vacant positions
How your team accesses the workforce planning that's being done in the product will vary depending on their part in the process. For example, hiring managers will likely need to be added as compensation editors (the highest level of access), whereas your finance team may only need a CSV export without accessing Functionly itself.
In this section:
Collaborating in Functionly
For users who will need access to Functionly for your hiring process, we have different access levels to suit all your needs. You can read more about the different levels of access and how to add users.
Sharing for feedback
If you want feedback from someone in your team but don't want them to sign up to Funcitonly, make changes, or be a billable user then you can share via our links where viewers will see nearly everything you see. Read all about how to use links here.
Sharing outside Functionly
If there are people in your organization who are time-poor (CEOs and founders) and need to easily and quickly see your work to provide approval, you can share exports in a variety of formats. Click here to explore the different ways to export your scenario.