
Contents:
- Product update
- Getting started
- Choosing a functional library
- Create, edit and remove superfunctions, functions, or activities
- Add accountabilities to positions
- Add roles to positions
- Create and edit your own roles
- Add responsibilities to a role
How it was: In Functionly, Accountabilities and Responsibilities used to refer to the same objects in the product, which were "functions," and functions also had more granular detail on the tasks that comprised them, known as "Activities".
How it is now: We have recently made a change to more clearly differentiate between Accountabilities and Responsibilities. Functions are now called "Accountabilities" and can be found, added, and edited using the "Functional chart" or "Functions" section of the left-hand menu, then applied to any position. Responsibilities can now be added as a free text field to any Role and tagged with an existing Accountability.
What happens to your existing Responsibilities: If you had Responsibilities added to a role previously, don't worry, you won't lose this work. The component Activities that made up the old Responsibilities will be shown on the role and each will be tagged with the correct Accountability. So all information that was added for your roles previously remains; it's just easier to edit.
Have feedback about this update? We'd love to hear from you via support@functionly.com or our "contact us" page.
2. Getting started
If you read our article to help understand roles and responsibilities you'll know that roles are essentially like descriptive containers that are applied to people and positions e.g. "People Business Partner", and these roles contain responsibilities (the actual work that gets done) e.g. "Workforce Planning" or "Performance Management".
You can create the roles that you have in your organization first and then apply responsibilities but in our experience, it's helpful to create your responsibilities first by adding them as functions to your library.
Creating the responsibilities first allows you the clarity of really assessing what the work to be done within your organization is without initially clouding your vision by thinking about a specific person in your org who already has a similar role.
This will prove particularly important when it comes to workforce and headcount planning, where you may be hiring for many positions, as having a clear picture of what your new hires should be responsible for is crucial for them and you, rather than trying to recruit a clone of someone who's already in your organization.
Creating your responsibilities first will help you approach the org design process in a people-agnostic way that will allow you to really hone in on what it is that you want each role to be doing and, if you're hiring, potentially hire a great candidate, unlike anyone currently in your organization.
Read more about the relationship between positions, roles, accountabilities, and responsibilities.
3. Choosing a functional library
Before you start creating your organization's roles and responsibilities, you'll be asked to select a functional library as the foundation to build your own library on top of. Then in future anytime you create a new scenario you can choose your own library as the starting point and continue adding to it. You can select a pre-generated library, such as Software as a Service or Managed Service Provider, or choose a "blank" library and build your own from scratch.
Select a library for a new scenario:
- Click "Create new scenario"
- Select the functional library that most closely resembles your organization or a blank library
- Select import method and continue
Select a library for an existing scenario:
- Select the "Role templates" tab on the left-hand nav
- Click "Select library"
- Select the functional library that most closely resembles your organization or a blank library
4. Create, edit and remove superfunctions, functions, or activities
Creating your organization's functions will allow you to add them to your org chart as accountabilities and responsibilities.
When you select "Functional chart" from the view dropdown in the top left of your org chart it will bring up a list of all of the superfunctions (the headings) and functions (the sub-headings) in that particular functional library.
If you want to get more granular with your organization's accountabilities and responsibilities then you can also add activities to any function.
In this section:
- Create superfunctions, functions, and activities
- Edit, disable or delete superfunctions, functions or activities
Create superfunctions, functions, and activities
Create a superfunction:
- Select "Functional chart" from the view dropdown
- Scroll to the bottom of the list
- Click "Add superfunction"
Create a function:
- Select "Functional chart" from the view dropdown
- Click "Add function" to any existing superfunction
- Or scroll to the bottom of the functional chart to first add a new superfunction
Create an activity:
- Select "Functional chart" from the view dropdown
- Click on the title for any superfunction
- Open the folder for any function
- "Click add" activity
Edit, disable and delete superfunctions, functions, or activities
Anywhere in Functionly that you see an ellipsis icon (three dots), you can open a menu for the item it's in line with and this is true of superfunctions, functions or activities.

Superfunctions and functions
- Select "Functional chart" from the view dropdown
- Click the ellipsis next to any superfunction or function
Activities
- Select "Functional chart" from the view dropdown
- Click on the title of a superfunction
- Click the arrow next to a function
- Click on the ellipsis next to any activity
5. Add accountabilities to positions
If you would like to map functions to leaders in your organization you can add them as accountabilities. Accountabilities differ from responsibilities as, in most cases, people won't be completing the work that they're accountable for themselves, whereas when someone is responsible for a function as a part of their role, this is work they will actually be doing.
In this section:
Add accountabilities using the org chart:
- Click properties in the top right of the org chart
- Toggle "accountabilities" to the on position
- Open the left menu using the button near the top left
- Click "functions" column
- Open the superfunction (the headings) folder you want
- Drag and drop a function onto any position
Add accountabilities via the functional chart:
- Click the "view" menu near the top left
- Select "functional chart"
- Click on a function
- Click the plus sign next to "accountable"
- Search the name of the person or position you would like to make accountable
- Hit enter or return
6. Add roles to positions
Adding roles to positions will allow you to make people responsible for different work within your organization and add secondary (dotted-line) reporting so you can visualize structures like cross-functional and matrix teams.
Add a role to a position by searching
- Click the ⚙️ settings cog next to the view menu
- Hover over properties and ensure "roles" are toggled "on"
- Click "add a role" or "no role" on any position
- Type in the name of the role and hit return or enter
If the role exists in the role library, a prompt will appear as you type in the name; if not, you can apply a new role and create a template using the ellipsis next to the role name.
Add a role to a position using drag and drop
- Click the ⚙️ settings cog next to the view menu
- Hover over properties and ensure "roles" are toggled "on"
- Select the "roles" tab on the left-hand menu
- Drag and drop a role from the left onto a position

7. Create and edit your own roles
There are different ways to create new roles depending on...
Create a brand new role template
- Open the left-hand nav
- Select the "Role Templates" tab
- Click "Add role template" below any job family (the headings)
OR
Add a role to your own job family:
- Open the left-hand nav
- Select the "Role Templates" tab
- Scroll to the bottom of the list
- Click "add job family"
- Then "Add role template"
Rename an existing role
- Select the "Role Templates" tab on the left-hand nav
- Click the ellipsis (three dots) next to any role
- Select rename
Save a role template
If there are roles on your chart that aren't already in our library then you can easily save them as new templates:
- Locate the role on your org chart
- Click the ellipsis (three dots) next to it
- Select "Make role template"
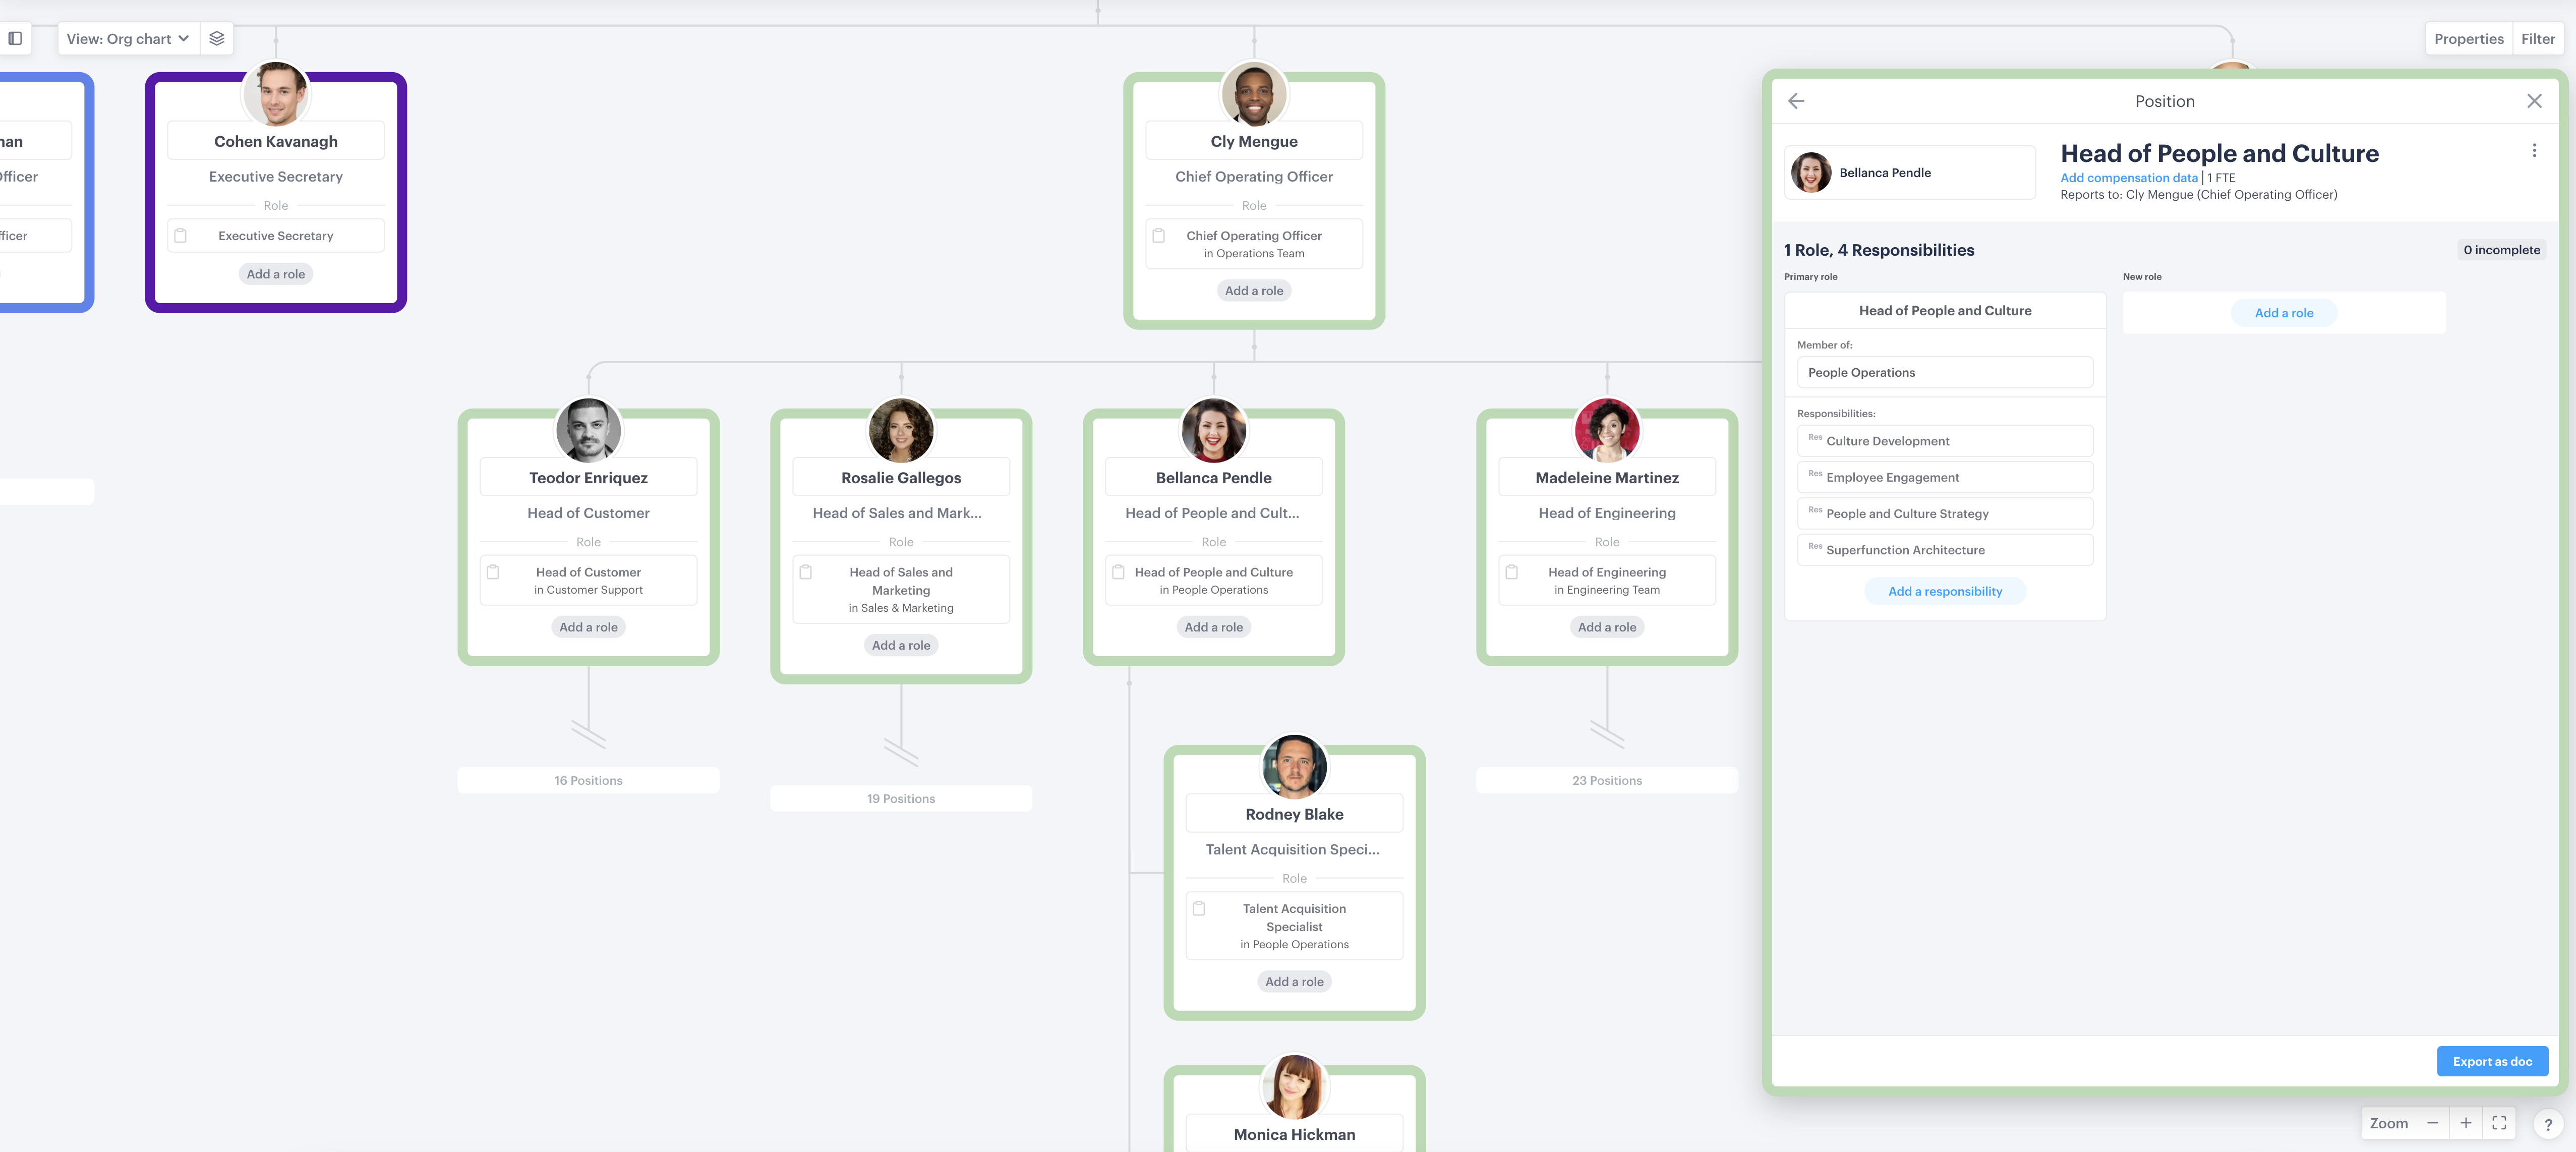
8. Add responsibilities to a role
Adding responsibilities to a role template will mean that when you apply that template to a person or vacant position within the organization in the future, those responsibilities will automatically be applied.
To add responsibilities to a role:
- Open the left-hand nav
- Select the "Role Templates" tab
- Click on any role to open and view functions
- Drag and drop functions onto the open role window to apply responsibilities
Or:
- Click on any role that's been added to the org chart
- Click add responsibility or start dragging functions and superfunctions from the left (Accountabilities must be turned on to access the Functions tab)